This post is a little late in coming, but this past March I married a wonderful and patient woman, Beth. For our wedding we wanted to keep costs low and still make it very personalized, so we did all of the planning and made several custom pieces for our special day. We planned color schemes, table settings, and the hall layout using InkScape - an open source SVG editor, and Beth made beautiful blue and black ribbon table squares for the centerpieces. I designed 3D printed candle holders, and custom ties for my groomsmen presents.
More details and fancy bits after the break.
Showing posts with label rapid prototyping. Show all posts
Friday, September 2, 2011
Automatic Cat Feeder
It's 4am, and I'm sound asleep dreaming of robots when I'm startled awake by 10 lbs of hungry cat jumping on my face with a pleading "mew". I get up, feed the cats, and unsuccessfully attempt to resume my slumber. This scene repeated itself every day for only a couple weeks before I decided I needed an automatic cat feeder to maintain my sanity.
The feeder needed to only handle dry food, be able to ration food quantity so that the cats wouldn't get fat, and it needed to have a lot of storage so that the cats wouldn't starve while my wife and I were traveling. Similar off-the-shelf feeders cost upwards of $50, and I like a challenge, so I set out to build one myself.
Build details and more pictures after the break.
The feeder needed to only handle dry food, be able to ration food quantity so that the cats wouldn't get fat, and it needed to have a lot of storage so that the cats wouldn't starve while my wife and I were traveling. Similar off-the-shelf feeders cost upwards of $50, and I like a challenge, so I set out to build one myself.
Build details and more pictures after the break.
Labels:
3D modeling,
Arduino,
circuits,
Code,
design,
food,
machines,
Maker,
rapid prototyping,
robotics
Tuesday, June 29, 2010
Graffiti Analysis Sculptures
Graffiti Analysis: 3D from Evan Roth on Vimeo.
Graffiti Analysis: Sculptures is a series of new physical sculptures that I am making from motion tracked graffiti data. New software (GA 3D) imports .gml files (Graffiti Markup Language) captured using Graffiti Analysis, creates 3D geometry based on the data and then exports a 3D representation of the tag as a .stl file (a common file format compatible with most 3D software packages including Blender, Maya and 3DS Max). Time is extruded in the Z dimension and pen speed is represented by the thickness of the model at any given point. I then have this data 3D printed to create a physical sculpture that serves as a data visualization of the tag. For the Street and Studio exhibition at the Kunsthalle Wein, I collaborated with an anonymous local Viennese graffiti writer and had the GA sculpture printed in ABS plastic. Graffiti motion data of his tag was captured in the streets (for the first time) at various points around Vienna.
More information (including software, source code, and many more pictures) can be found at Evan's website.
Labels:
3D modeling,
algorithms,
Art,
blinkenlights,
machine vision,
rapid prototyping
Wednesday, June 9, 2010
3D Printed UAT Shadow Sculpture
Last week I built this shadow sculpture inspired by the cover of the Pulitzer-prize winning book "Gödel, Escher, Bach: An Eternal Golden Braid" this is a 3D-printed form that casts three orthogonal shadows in the shapes of the letters UAT. After I printed it, I used some blue LEDs and foam-core to build a little display platform for it.
Here is the Inventor part file: UATCube.ipt
Labels:
3D modeling,
blinkenlights,
Maker,
rapid prototyping,
UAT
Monday, May 31, 2010
The Guardian: Inexpensive AVR-based Cat Food Protection
Over 6 months ago we added two kittens (Duke and Ella) to our household, and we found out that our dog, Riley was eating their food. To prevent this, I built the Guardian, an AVR-based protection system that humanely keeps Riley away from the cat food, but is not triggered by the cats themselves.
I wanted this setup to be cheap, so I decided to use an infrared "trip-wire" system. On one side of the hallway is an always-on infrared emitter, and on the other side is an infrared receiver, an AVR ATmega8 microcontroller, and a buzzer. The micocontroller continuously checks to see if the beam between the emitter and receiver has been broken - if it has, it sounds the alarm, which Riley hates, driving him away. The microcontroller is programmed so that small, fast things (such as cat tails) do not trigger the alarm. Also, the whole rig is place at Rileys shoulder height, which is much taller than the cats bodies.
This may not work for most dogs, as Riley is a pansy and afraid of loud noises, but here are the schematics, source code, and a rough bill of materials:
Schematics (Eagle, PNG)
Source Code
Bill of Materials
Labels:
Arduino,
dog,
electrical engineering,
machines,
Maker,
rapid prototyping,
UAT
Saturday, May 29, 2010
3D Printed Tensegrity Structure
This weekend I built a Tensegrity structure as a demonstration of principles of balancing tension and compression in structures for my course RBT379 - Mechatronics. I've been fascinated by the aesthetic of these structures - all triangles and edges, but somehow magical as your brain tries to wrap itself around the reasons why the solid supports seem to be floating in air, and the structure is still standing.
I found a couple of excellent pages documenting how the structures work and are assembled - one from the artist Kenneth Snelson explaining the aesthetic inspiration for Tensegrity structures as a kind of 3-dimensional weaving, and another more practical site detailing the construction of a Tensegrity coffee table.
I used the UAT 3D printer to make 12 struts. You can make these out of much simpler materials (wood, copper, chopsticks, etc), but the Inventor Part design for the struts are provided here. A gallery of the build process and completed 3-level structure (and one rubber-band version) are below.
I used 20lb test mono-filament fishing line and 2 sets of good smooth-jaw pliers to tie the knots (grip-jaw pliers scar the fishing line, causing breaks after you've carefully tied many little knots), following the guidelines at the Tensegrity coffee table website. If you do this yourself, construct a jig that will allow you to accurately create the tension links at a certain distance (the length of your struts divided by 1.4).
I built 3 modules, 2 "left-handed" and 1 "right-handed." To assemble them into the tower, I hooked the struts of one module into the base triangle of tension elements of another, forcing the base triangle into a hexagon.
The resulting structure is surprisingly sturdy, and the fishing line is somewhat transparent, adding to the mystical effect I was trying to emphasize.


I found a couple of excellent pages documenting how the structures work and are assembled - one from the artist Kenneth Snelson explaining the aesthetic inspiration for Tensegrity structures as a kind of 3-dimensional weaving, and another more practical site detailing the construction of a Tensegrity coffee table.
I used the UAT 3D printer to make 12 struts. You can make these out of much simpler materials (wood, copper, chopsticks, etc), but the Inventor Part design for the struts are provided here. A gallery of the build process and completed 3-level structure (and one rubber-band version) are below.
I used 20lb test mono-filament fishing line and 2 sets of good smooth-jaw pliers to tie the knots (grip-jaw pliers scar the fishing line, causing breaks after you've carefully tied many little knots), following the guidelines at the Tensegrity coffee table website. If you do this yourself, construct a jig that will allow you to accurately create the tension links at a certain distance (the length of your struts divided by 1.4).
I built 3 modules, 2 "left-handed" and 1 "right-handed." To assemble them into the tower, I hooked the struts of one module into the base triangle of tension elements of another, forcing the base triangle into a hexagon.
The resulting structure is surprisingly sturdy, and the fishing line is somewhat transparent, adding to the mystical effect I was trying to emphasize.

Labels:
3D modeling,
machines,
rapid prototyping,
RBT379,
UAT
Saturday, April 3, 2010
Practice Makes Perfecgt
From Flickr user mrbbking:
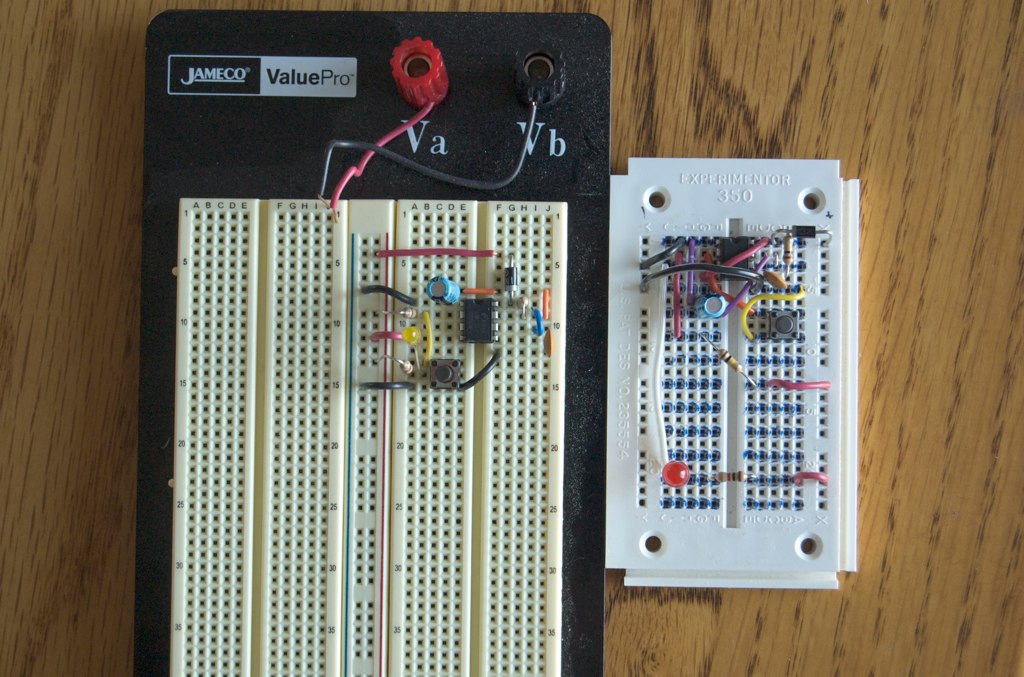
Two copies of the same circuit. The one on the right was done first, and is a pretty good rat's nest, if I do say so myself. The one on the left was built based on the other one, but with an eye toward clarity. Much easier to see what's going on! I guess that figuring out the layout based on a schematic is a skill that needs practice.
Labels:
breadboarding,
circuits,
logic design,
rapid prototyping,
tools
Thursday, March 25, 2010
Inventor and 3D Printing Demo
Here's a time-lapse video I made demonstrating the Autodesk Inventor interface and 3D printing. The model I'm making is a simple robot hand finger tip. The total time, from conception to physical model, is about an hour.
Wednesday, March 10, 2010
Cardboard Phone Robots
It's not word soup, it's an article at Wired.
This is the kind of thing that I'd like to see students produce in the Physical Computing Studio (RBT307) course next semester. Quick, dirty robots held together by hot glue and electrical tape. The idea is that once we strip away the requirement of long-term durability, we can move quickly through design iterations, and learn a great deal about functional, physical design and manufacturing methods.
Subscribe to:
Posts (Atom)